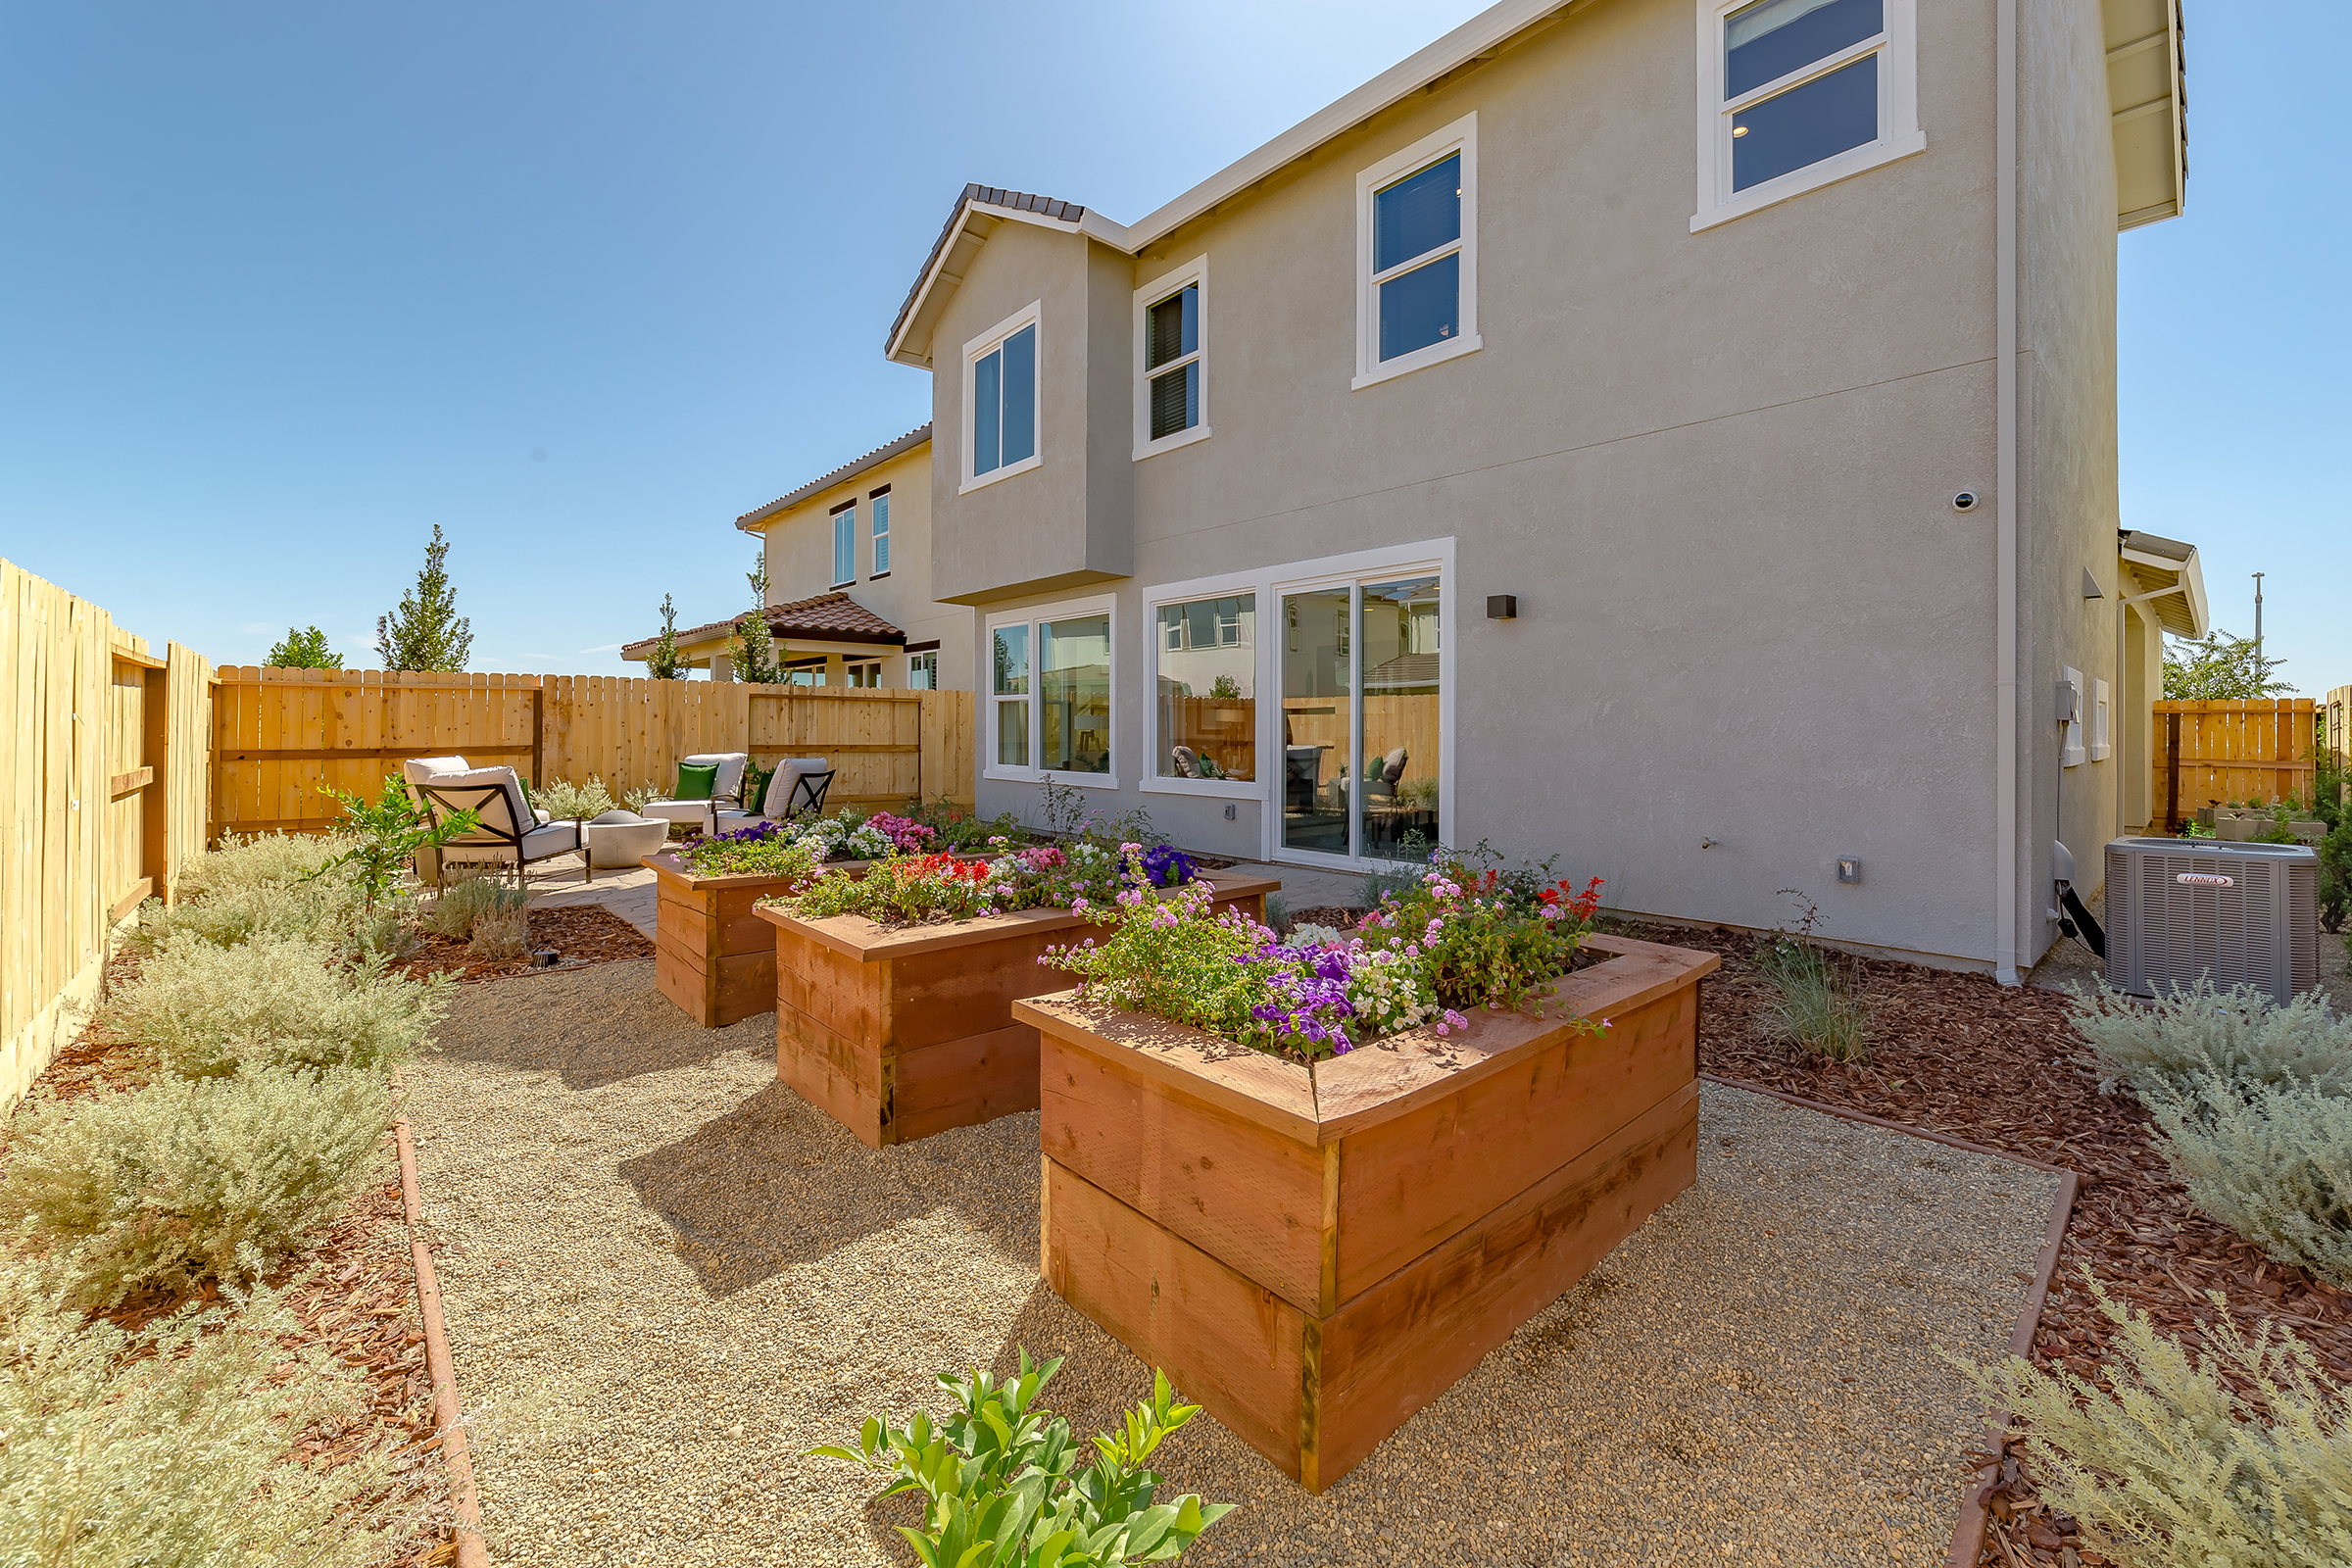
It’s summertime! Whether you’re at Brighton Station or Plumas Ranch, we’re sure you’ve noticed the days are longer and it’s getting oh, so hot. But what feels like too much for us is actually perfect for sun-loving veggies like tomatoes, zucchini, squash, and more!
The easiest way to begin your green thumb journey is to craft a simple DIY raised garden bed. This way it’s much easier to tend to your plants; you can even set up a simple drip-watering system without having to dig deep in your backyard, potentially harming pipes or tree roots. Follow our directions, and you’ll be able to build the 4-by-8-foot bed pictured here as a weekend project! Trust us, you’re going to have a vibrant garden in no time.
First, let’s figure out what you’ll need:
Materials:
- Two 4-foot-long 2-by-12s, for bed ends
- Two 8-foot-long 2-by-12s, for bed sides
- Twenty-four 3 1/2-inch #14 galvanized or stainless steel screws
- 16 cubic feet of planting soil (buying in bulk is more cost-efficient than bags)
- 16 cubic feet of compost (same here—bulk is the way to go)
- Twenty-four 1/2-inch #8 galvanized or stainless steel screws; optional
- Six 12-inch-long pieces of 1/2-inch PVC pipes; optional
- Three 10-foot-long pieces of 3/8-gauge rebar; optional
- Three 3- by 5-foot rolls of 1/4-inch-mesh hardware cloth, to deter burrowing animals; optional
- Twelve 1-inch galvanized tube straps; optional
- 1 roll bird netting or floating row cover; optional
- Drip-watering system; optional
Tools:
- Drill
- 5/32-inch drill bit
- Pencil
- Ruler
- Shovel or trowel
- Level (optional)
- Gloves
- Staple gun
- Wire cutters
- 4 adjustable woodworking bar clamps: 2 short (12 inches) and 2 long (6 feet); optional
Something to note about the wood: there are many places to grab it, but we suggest going to a lumber yard because they can cut the wood for you. If you do end up doing it yourself, make sure to measure twice, cut once.
Frame
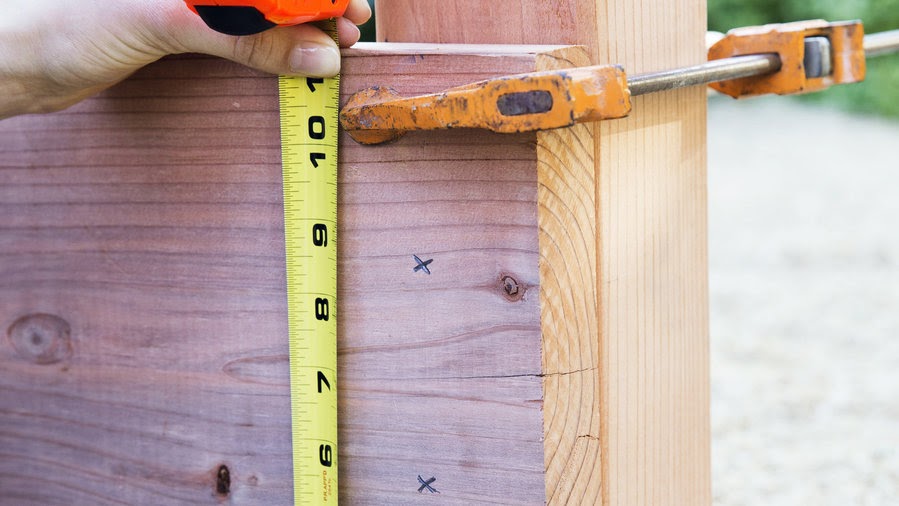
First off, you’ll build the bed upside down. On a flat surface, set a 4-foot 2-by-12 board on its narrow side edge; at one end of the board, place a 16-inch 4-by-4 corner post upright and flush with the end of the board. Use two adjustable woodworking clamps—or a buddy—to keep both pieces of wood flush on the sides and bottom.
Drill to attach the post to the board. Pro-tip: pre-drill three holes, evenly spaced in the board with a 5/32-inch drill bit for ease and to prevent splitting. Then, secure the board to the post with three 3 ½-inch screws.
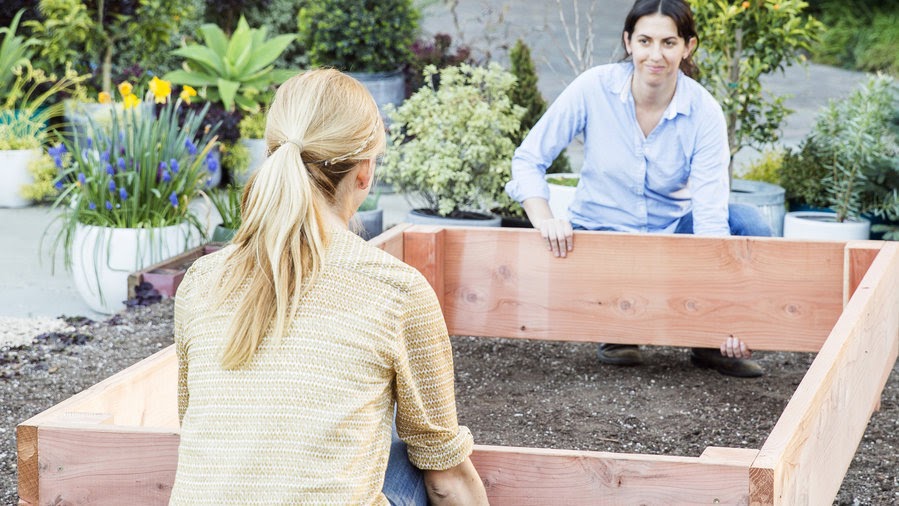
Now that you’ve got that down, grab your woodworking clamps (or your buddy!) and repeat the process with the other end to complete the garden bed.
Position the bed
Before flipping it over, you may want to clear the grass from where the bed is going to go. Some assume the grass will just die, and while that may be true, you’re also risking weeds later on. Once the ground is reasonably level, flip the bed right side up and move it into position. Keep lighting in mind; if you’re planning on planting veggies, you’ll need a spot with full sun—aka, at least 6 hours per day. Placing your bed in a north-south orientation will give you even exposure.
When you have the perfect spot picked out, dig a 5- to 6-inch deep hole for each corner post. Finally, sink it into the ground. Backfill the corner holes as necessary to make sure the bed is level. This is where your level will come in handy!
Optional: Keep out birds, frost, and burrowing pests.
If you’re interested in keeping out birds and frost, you should consider adding hoops to hold up bird netting or a floating row cover. It’s best to attach the PVC support tubes now, before filling the bed with dirt.
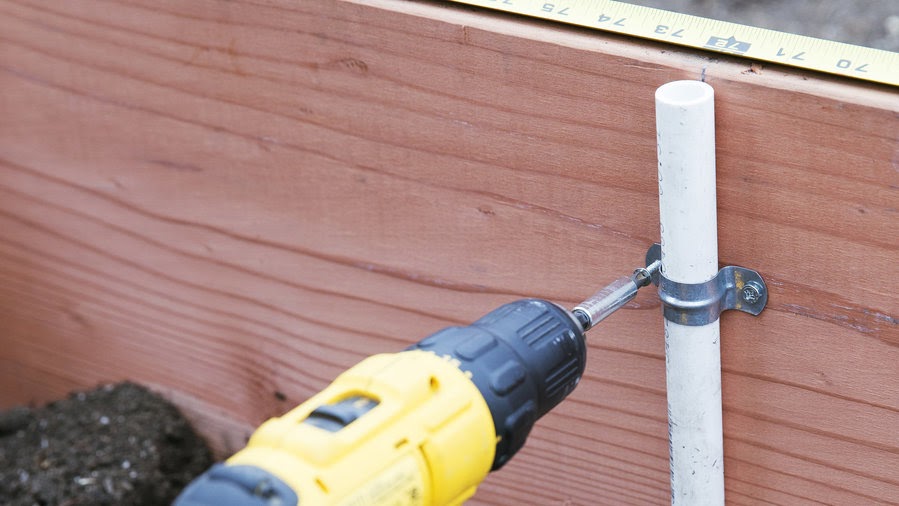
Secure each PVC pipe upright to the inside of the bed with two tube straps and two ½-inch screws per strap.
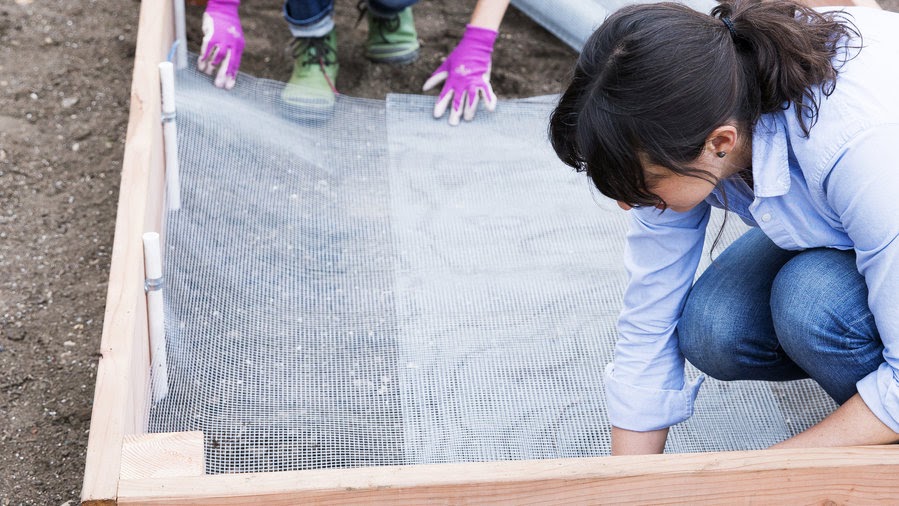
To protect from burrowing pests, you can add a layer of hardware cloth in the bottom—again, before adding in your soil.
Here’s what to do: Rake existing soil at the bottom of the bed to level it, then tamp it smooth. Wearing gloves, line the bed bottom with hardware cloth, making sure that the cloth is lying flat on the bottom and curving up to touch each side of the bed. Secure the cloth by stapling it to the sides of the bed. Use wire cutters to trim excess cloth and to help the cloth fit flush around the corner posts.
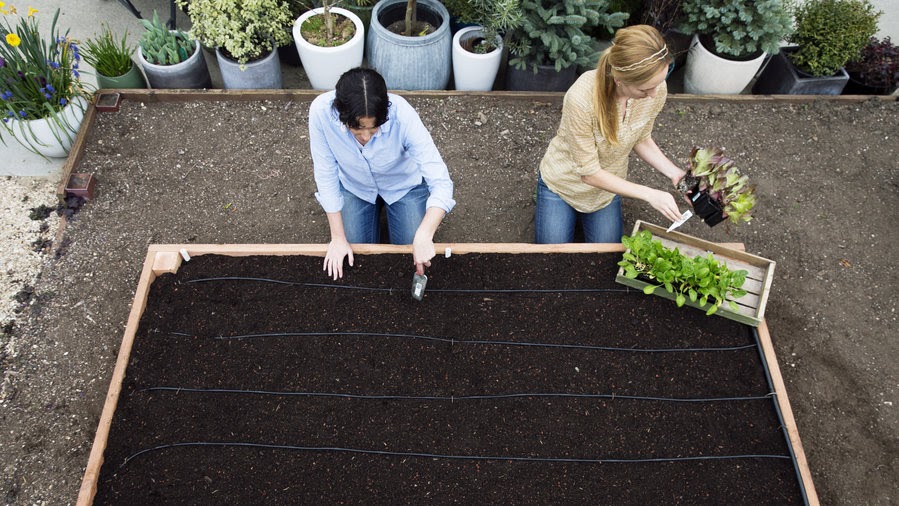
Add soil and set up irrigation
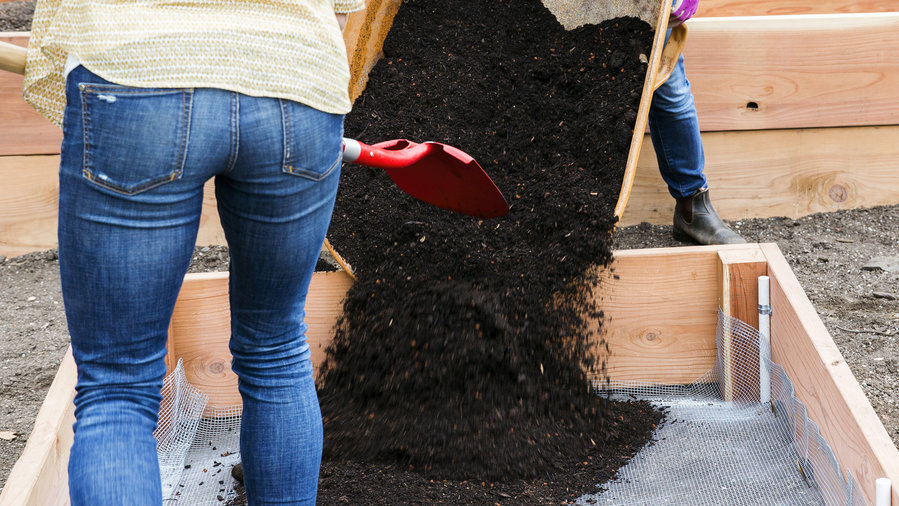
Finally, the pièce de résistance! Fill the bed with a 50/50 mixture of planting soil and compost. Rake it smooth and moisten it with a gentle spray from the hose.
If you have a drip system, simply connect this bed to your existing irrigation line. To evenly cover this 4×8 ft. bed evenly, we recommend adding ¼-inch emitter lines every 12 inches to ½ inch tubing.
Now, plant!

You’re all set to start the veggie garden you’ve been dreaming of! If you’re not sure what to start with, ask for some help at your local garden store. Happy gardening!

LEAVE A COMMENT